SASS is one of the best innovations in web designing. It has come as a blessing for the web designers and has revolutionized the field of web designing.
What is SASS?
SASS is an extension to CSS. It is an acronym for “Syntactically Awesome Stylesheets”, a CSS pre-processor that adds logic to the styling document before it passes through a software which turns it into plain, regular CSS which the browsers can understand.
Why use SASS?
- SASS is fully CSS-compatible pre-processing language that uses its own syntax for CSS.
- It is more powerful, elegant and stable than CSS.
- It is an open-source pre-processor that is easy, clean and short in programming construct.
- It supports features that aids in creating awesome stylesheets and writing code more efficiently.
- It also facilitates language extensions, logic statements and other useful built-in functions for manipulating colors and other values.
- It keeps your responsive project more organized.
- It eliminates the need to repeat the similar CSS again and again in your project.
- It provides many advanced features along with the regular CSS features.
How to install SASS?
You can install SASS using many third-party applications or command line. Here, we will discuss only the easiest way to install SASS – by installing Ruby.
Go to the link https://www.ruby-lang.org/en/downloads/ and download the stable version of Ruby. Follow all the steps and complete its installation. Once the installation is completed go to the start menu and run command prompt with Ruby.

Then, enter the following line: gem install sass
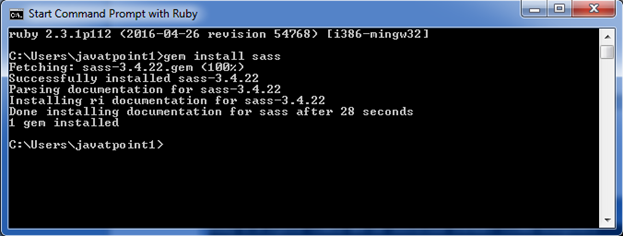
This will successfully complete the installation of SASS.
Features of SASS
Preprocessing
CSS is fun to write but when the stylesheets become larger and more complex, it becomes difficult to maintain them. This is where the pre-processor can help. As mentioned above SASS is an extension to CSS and provides some advanced features like variables, nesting, mixins, operators, inheritance and many more that does not exist in the CSS yet. Once you start working on the SASS file, it will take the pre-processed SASS file as a regular CSS file which can be used later on the website.
This can be done directly in your terminal. Once the installation is completed, you can compile your SASS to CSS using sass command. You will have to tell SASS from which file to build to and where to output the CSS as shown in the example below:
[cc lang=”C#”]sass input.scss ouput.css[/cc]
This means that SASS will take a single input.scss SASS file and will compile it to ouput.css file.
You can watch individual files and folders using the –watch flag. The watch flag as it name suggests tells SASS to keep a watch on the files and folders for changes and re-compile CSS each time you make changes and save your SASS file. For example,
[cc lang=”C#”]sass –watch input.scss output.css[/cc]
In the above example, SASS will keep a watch on input.scss file for changes and will recompile output.css every time you save the input file.
You can do this for entire folder too. For example,
[cc lang=”C#”]sass –watch app/sass:public/stylesheets[/cc]
In the above example, SASS will keep a watch on all the files in the app/sass folder and compile CSS to public/stylesheets folder.
You can also check version of SASS by running:
[cc lang=”C#”]sass -v[/cc]
Reuse values with variables
SASS facilitates the feature of variables. You can think of a variable as a box for or a way of storing values which you will want to reuse. SASS uses $ sign to make anything variable.
[cc lang=”C#”]
$base-color: #f2f2f2;
body {
background: $base-color;
}
[/cc]
When the SASS is processed, it takes the values for the variables defined above and outputs normal CSS with the variable values placed in the CSS as shown below. This can be helpful to maintain the consistency of the brand colors throughout the website.
[cc lang=”C#”]
body {
background: #f2f2f2;
}
[/cc]
Doing math with operators
SASS supports a handful of standard math operators like +,-,*,/ and % to do math in your CSS. Here’s an example:
[cc lang=”C#”]
$padding: 1em;
header {
padding: $padding $padding*2;
}
[/cc]
When the SASS will process, it will carry out this simple math and the generated CSS will look like this:
[cc lang=”C#”]
header {
padding: 1em 2em;
}
[/cc]
Nesting
SASS lets you nest the CSS selectors in a way that follows the same visual hierarchy of your HTML. But keep in mind that overly nested rules will result in over-qualified CSS that may be hard to maintain.
[cc lang=”C#”]
$link-color: #0f00ff;
$font-size: 16px;
nav {
ul {
margin:0;
padding: 0;
li {
list-style:none;
a {
font-size: $font-size;
color: $link-color;
}
}
}
}
[/cc]
Here, ul, li and a are the selectors nested under the nav selector. The generated CSS will look like this:
[cc lang=”C#”]
nav ul {
margin: 0;
padding: 0;
}
nav ul li {
list-style: none;
}
nav ul li a {
font-size: 16px;
color: #0f00ff;
}
[/cc]
This is a great way of organizing your CSS and make it easily readable.
Manage large stylesheets with SASS partials
SASS partials allow you to split your stylesheet into small manageable snippets of CSS which you can include in other SASS files. A SASS partial file should include as underscore (_) at the beginning. This indicates the SASS that it is just a partial SASS file and should not be generated into a CSS file.
You can import these partial files using @import. It works same as @import in CSS. The only difference is that in CSS, whenever you use @import it creates an another HTTP request. While in SASS, whenever you use @import, it combines the file you are importing with the file you are importing into and serves a single CSS file to the web browser, thereby reducing the number of HTTP requests. Take a look at the example below.
[cc lang=”C#”]
/sass
|– main.scss
|
|– /base
| |– variables.scss
| +– mixins.scss
|
|– /components
| |– buttons.scss
|
|– /layout
| |– header.scss
| |– footer.scss
| +– navbar.scss
[/cc]
[cc lang=”C#”]
@import “base/_variables”
@import “base/_mixins”
@import “components/_buttons”
@import “layout/_header”
@import “layout/_footer”
@import “layout/_navbar”
[/cc]
You can create as many partial files as you want. And keep in mind that the order of the files imported matters. The file with the variables should be imported ahead of the file where those variables are used.
Repeat common code blocks with Mixins
There are times when you have to write same code blocks with some minor changes. To avoid writing such common code blocks, SASS supports mixins. Mixin allows you to reuse the common code blocks while still allowing you to have customized values inside the block.
[cc lang=”C#”]
@mixin transition($value) {
-moz-transition: $value;
-ms-transition: $value;
transition: $value;
}
@mixin button($background, $text) {
display: inline-block;
padding: 0.5em 1em;
background: $background;
color: $text;
}
form button,
form input[type=”submit”],
form input[type=”button”] {
@include button(blue, white);
@include transition(all ease .2s);
}
[/cc]
The generated CSS will look like this:
[cc lang=”C#”]
form button,
form input[type=”submit”],
form input[type=”button”] {
display: inline-block;
padding: 0.5em 1em;
background: blue;
color: white;
-moz-transition: all ease .2s;
-ms-transition: all ease .2s;
transition: all ease .2s;
}
[/cc]
Extend / Inheritance
Using @extend in SASS allows you to share a set of properties from one selector to another. It is one of the most useful features of SASS.
[cc lang=”C#”]
border: 1px solid #ccc
padding: 10px
color: #333
.message
@extend %message-shared
.success
@extend %message-shared
border-color: green
.error
@extend %message-shared
border-color: red
.warning
@extend %message-shared
border-color: yellow
[/cc]
The above code tells .message, .success, .error and .warning to behave like %message-shared. Each of these class will also get the same CSS properties as %message-shared.
The generated CSS will look like this:
[cc lang=”C#”]
.message, .success, .error, .warning {
border: 1px solid #cccccc;
padding: 10px;
color: #333;}
.success {
border-color: green;}
.error {
border-color: red;}
.warning {
border-color: yellow;}
[/cc]
This is just a sneak peek into SASS. There are several other advanced features that SASS supports to make the process of creating stylesheets a breeze. At Brevity, we have talented web designers who have an extensive knowledge of SASS and can cater to any of your web designing needs. To hire our web designers, contact us!